Populating a Word Template for an Easy Win
Posted on January 12, 2025 • 7 minutes • 1348 words
Table of contents
Long time, no blog! I’m actually in a new role as a Digital Workplace Advisor, focusing on M365 Adoption and Training efforts at a global company. It’s been very busy but exciting and a great new challenge, but not a lot to report out in blog form thus far. However, I still get the opportunity to help people with Power Automate solutions as they present themselves to me, and this one was an easy win that really wowed the end user without a lot of work on my end - major win there!
One word of caution - this does involve a premium connector, so the account that owns the connection will need a Power Automate Premium license.
The Use Case
So at my new role, there is a need for one of the business units to send out RFPs that are formatted in a specific way to meet brand guidelines. The ask from the user was - “I want to make an RFP document that makes it easy for the business to input their ‘business needs’ while not touching the rest of the document” - aka not messing up the formatting and branding and such.
I remembered from my time working with SOPs at my previous gig that I had a Power Automate idea if he thought the business would be amenable to using Microsoft Forms, which he thought they would be, as the business relies pretty heavily on them for a variety of other things. So, I knew we were in business, and I got to work making a POC!
The Word Doc Part
Let’s say the template looked like this, but much, much prettier:
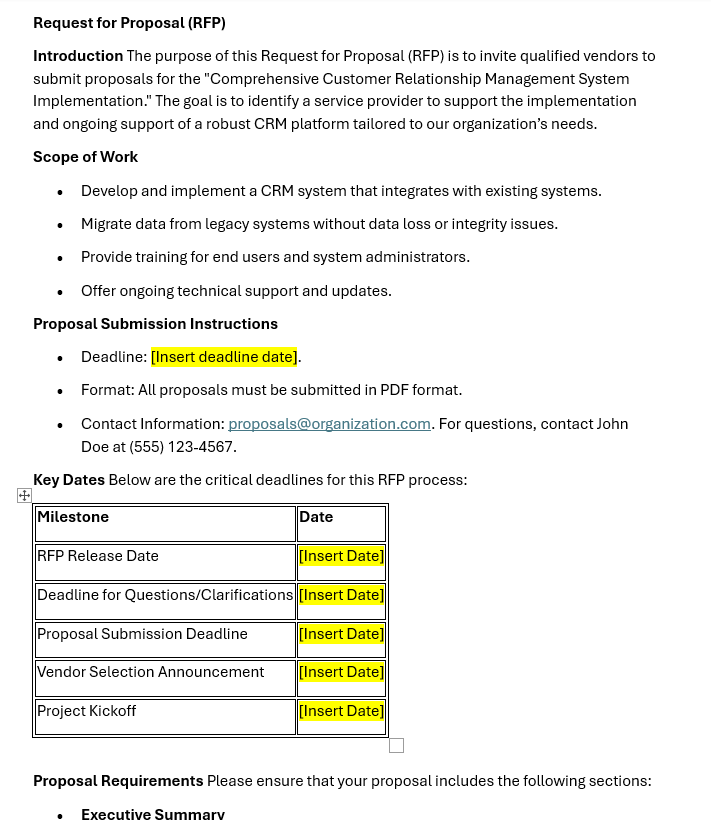
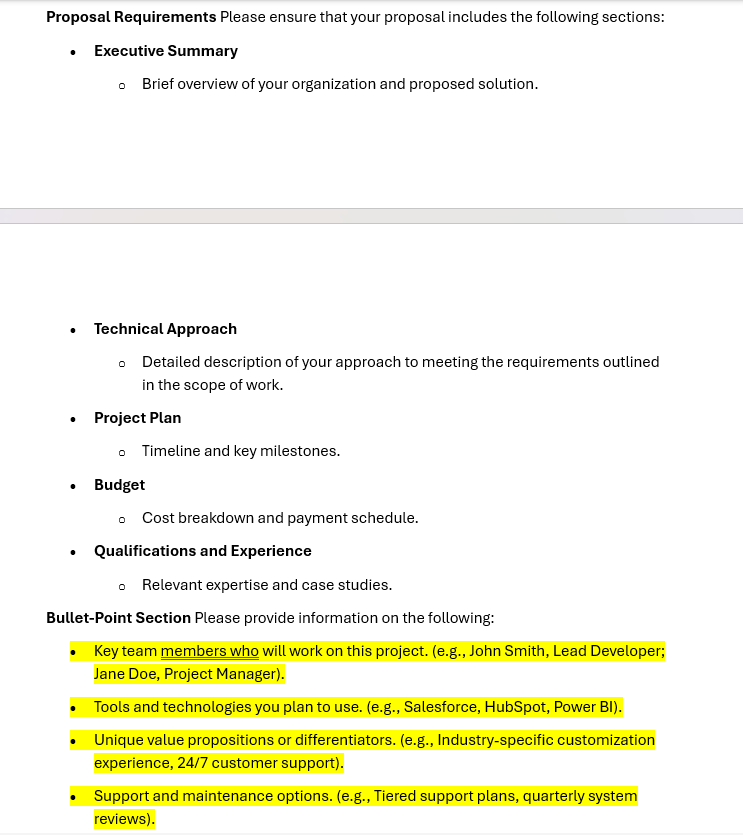
I was given a document like this, with yellow areas highlighted that the stakeholder wanted to be the areas that could be filled in by the business user. It was a variety of regular text, dates, and rich text, making Forms almost the perfect solution (you’ll see my “hack"y way of still using it shortly).
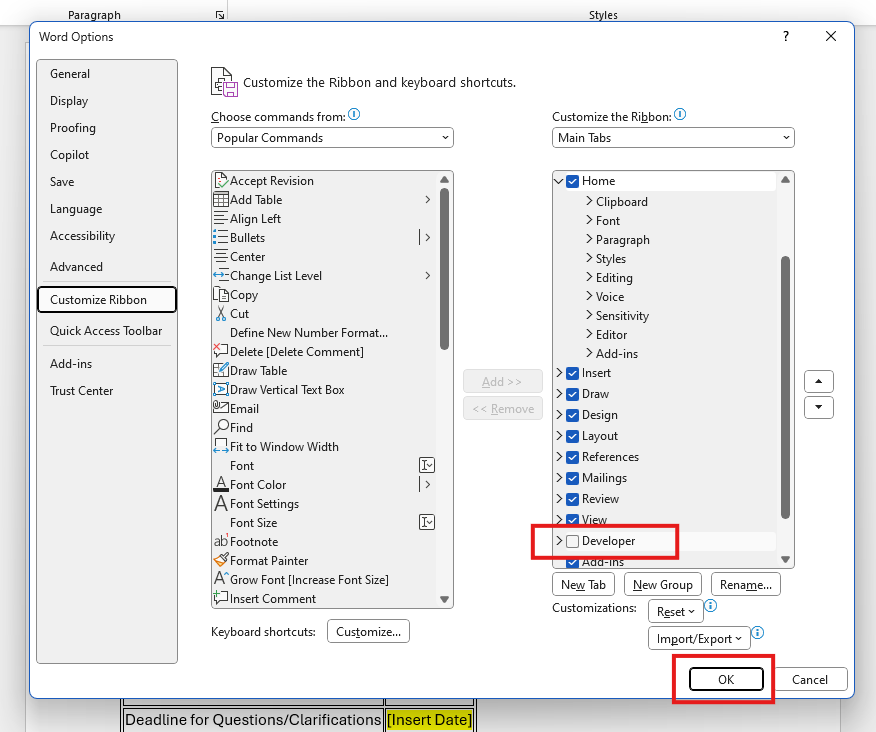
In Word, if you haven’t done this yet, right click in the ribbon and click “Customize the Ribbon”.

There, if it’s unchecked like in this image, you want to check the Developer box and click “OK”.
Click the Developer tab that you now have. Then, highlight the first section of text that you’d like to be able to “fill in” using Microsoft Forms. Then in the Developer tab, select the button marked in red - the “plain text content control” button.
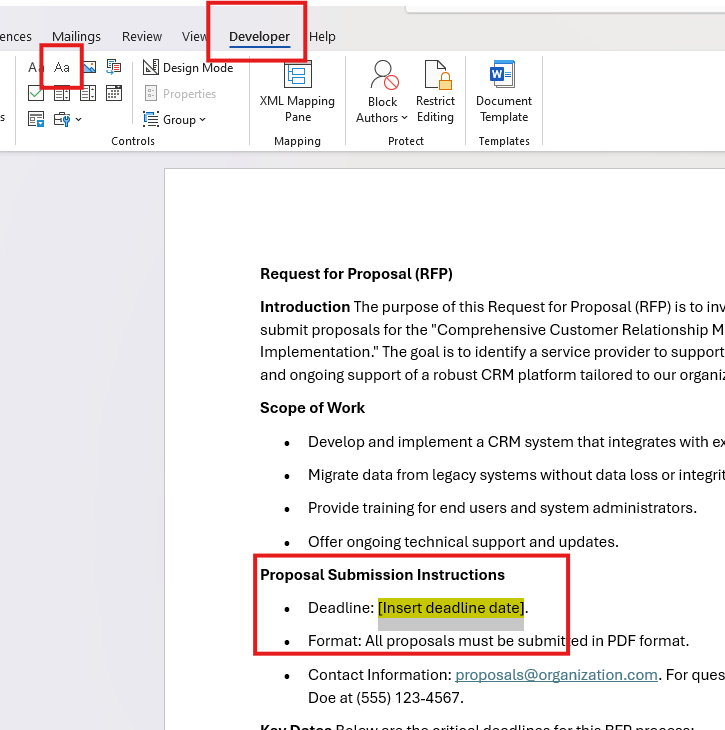
You will notice that what you highlighted now looks something like this:

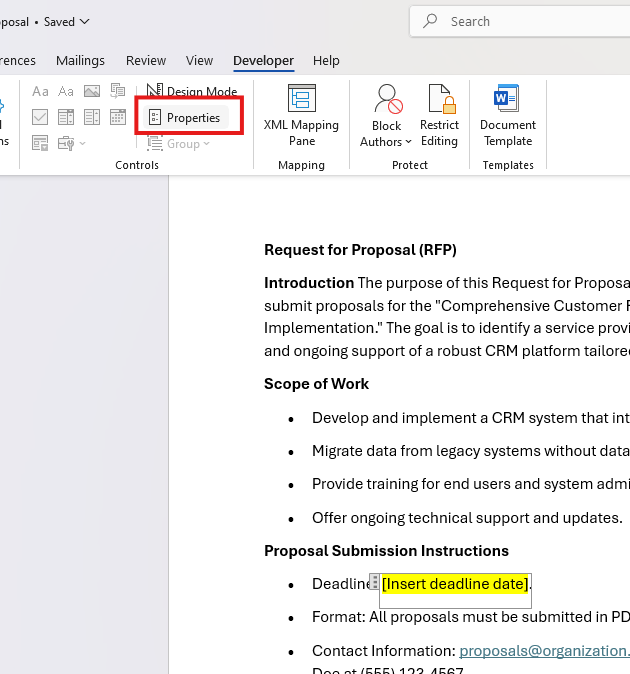
While your cursor is in that content control text box (meaning you can see the three dots to the left), go back to your ribbon and click “Properties”.
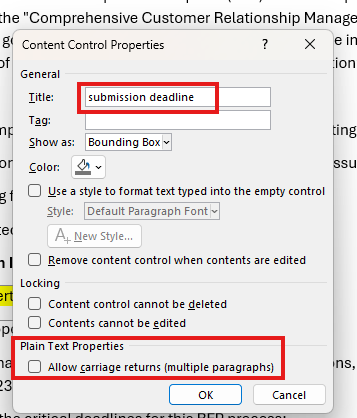
Give the content control a title that will be easy for you to distinguish what this field is when you are in Power Automate - that is what is going to then display when we are in Power Automate and looking for which field you want to put which dynamic content into. Also notice the other setting I’ve highlighted in red - we will need this later.
Repeat this for all of your other areas that you want to be able to populate from Microsoft Forms. This can include a block of bulleted text, but you will have to do something different here because of this:
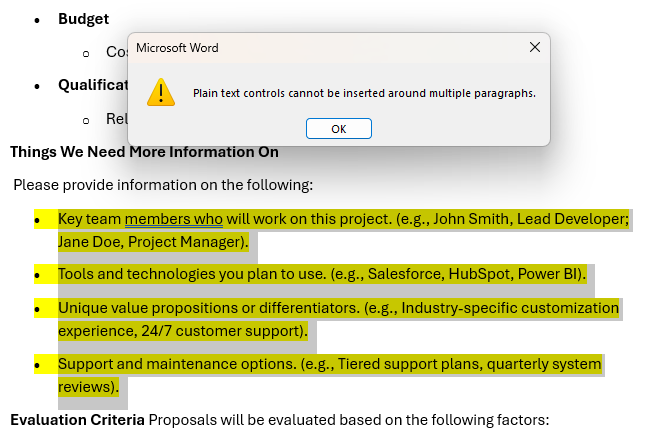
We could use a rich text content control, but those don’t get picked up by Power Automate, so we need to use the plain text option. So, make sure these directions are copied elsewhere to put into the Microsoft Form itself, and take the text itself out of the template, and just put in some short placeholder text:
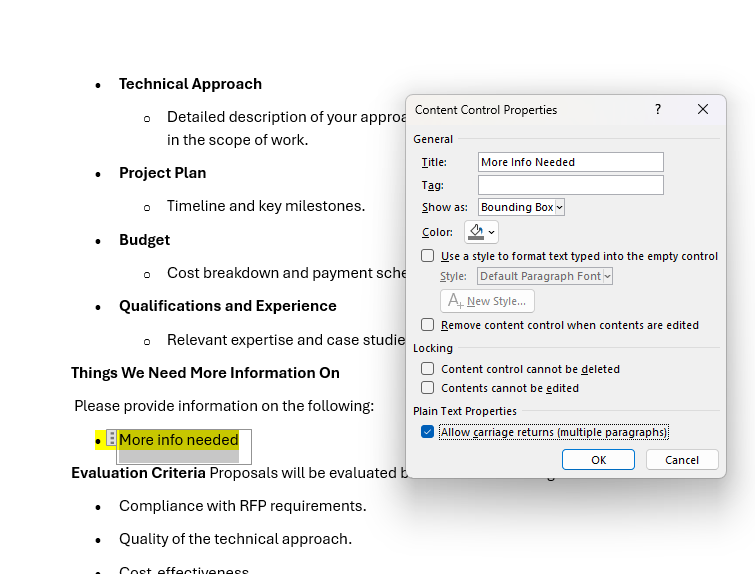
It may look like you’ve screwed up your template, but as long as people give you the stuff you want in the Microsoft Form, you are good to go. Also make sure you check that setting allowing for carriage returns when in the Properties section.
Make sure to save the file in your OneDrive or a SharePoint site - this is important for the flow.
The Microsoft Form Part
It’s tedious, but here you simply build out a form in Microsoft Forms that matches your highlighted/content control sections, like so:
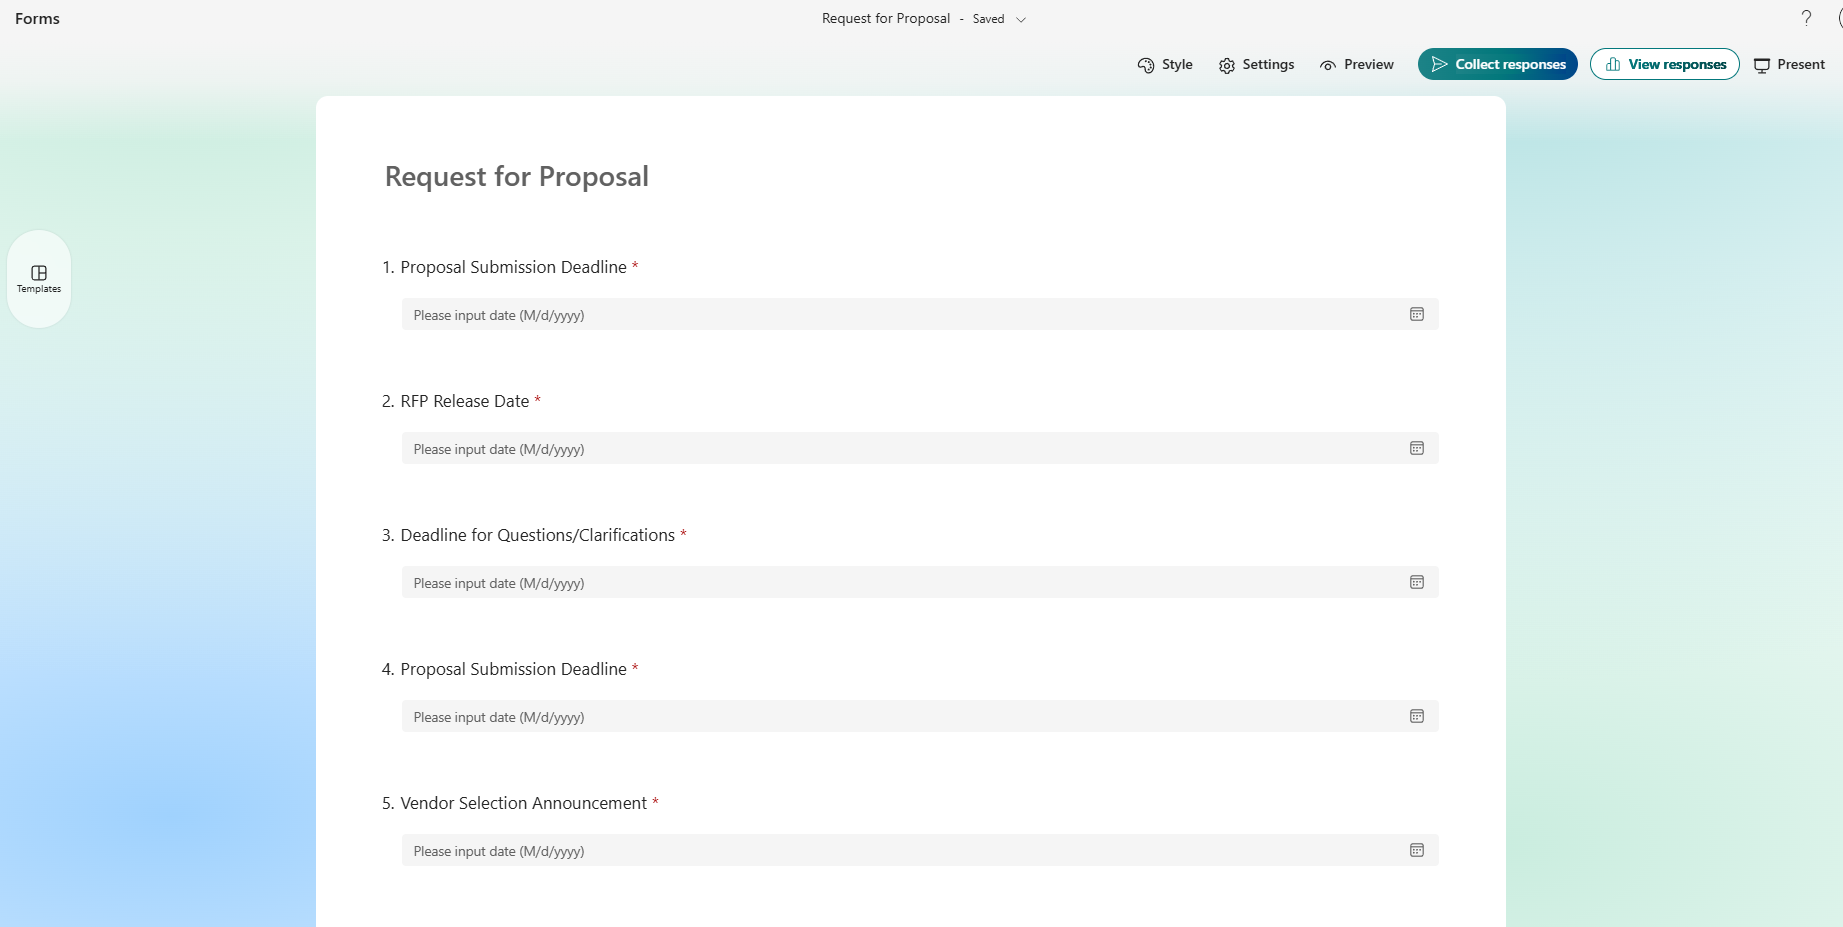
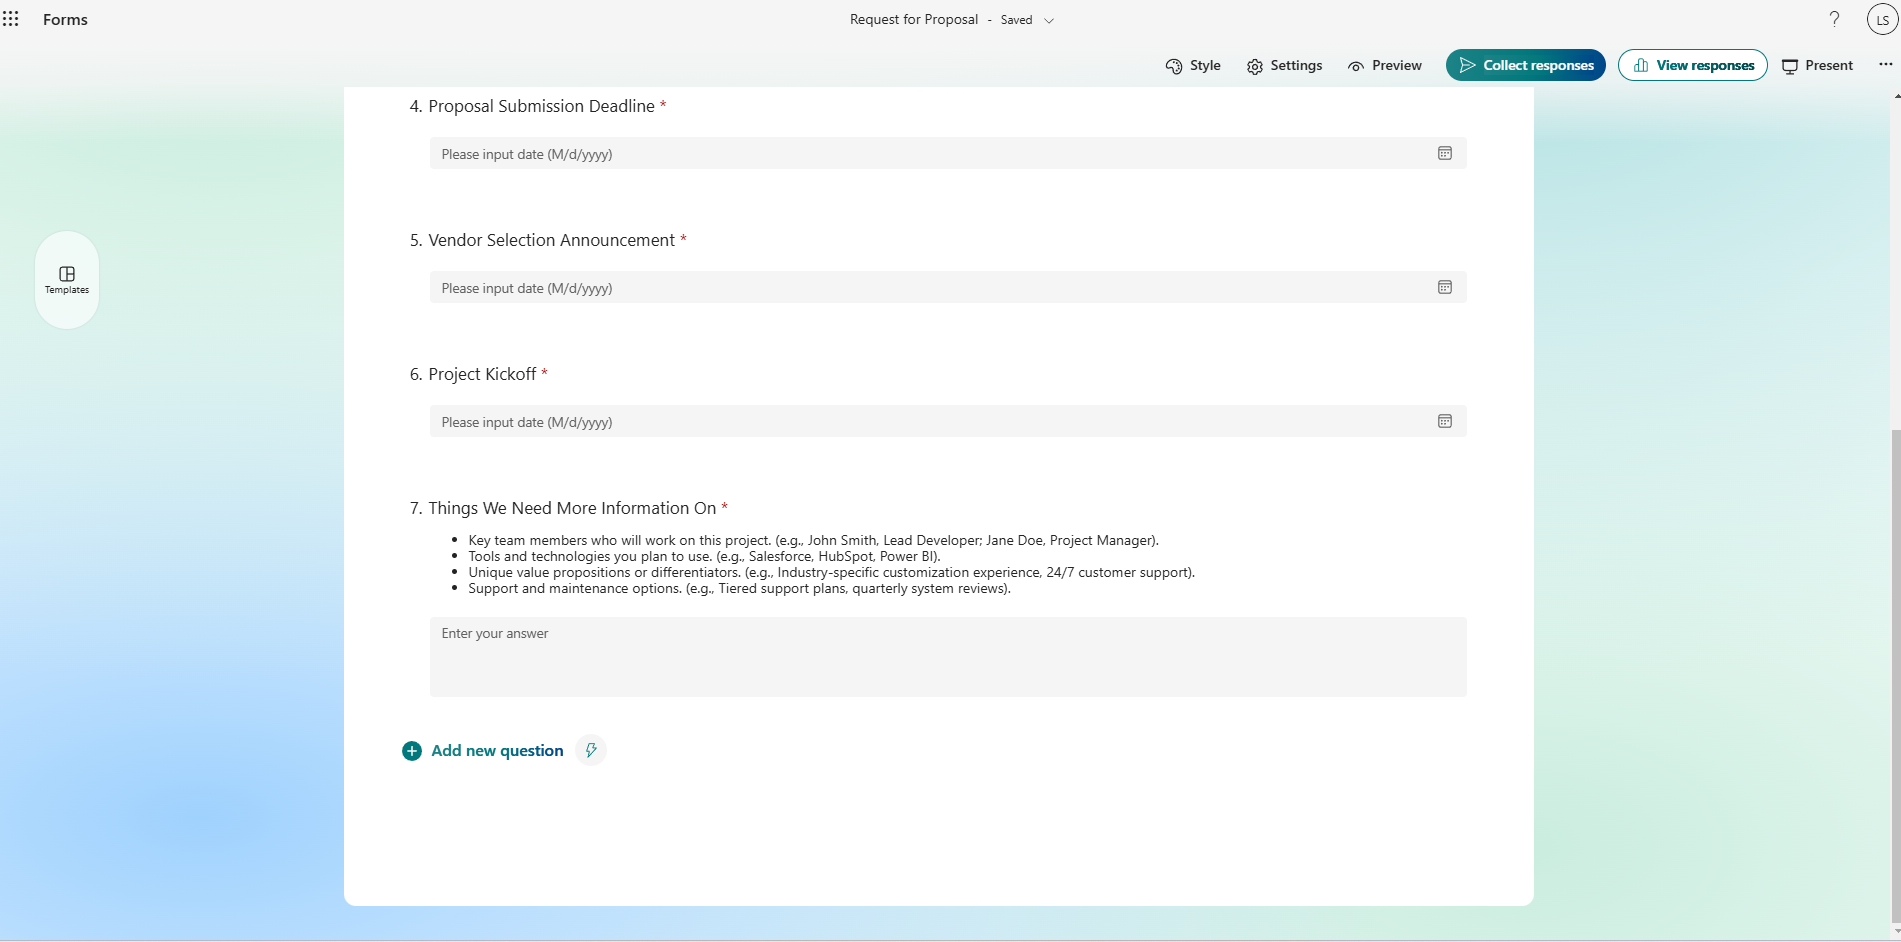
Note that I kept those bullet points I took out of the template and added them as a subtitle on a text question with a long answer selected for the last question.
The Power Automate Flow Part
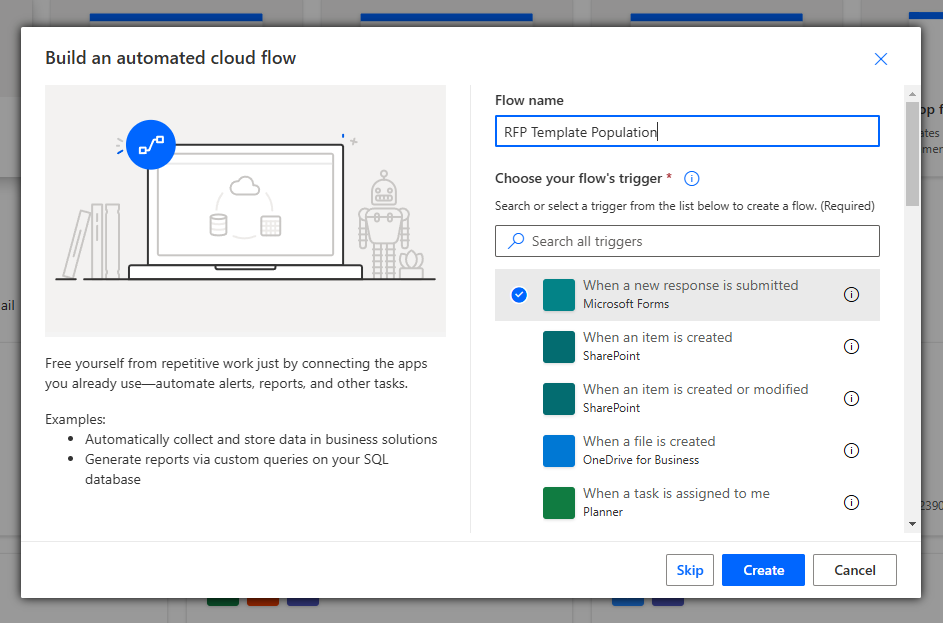
Get yourself to make.powerautomate.com and create a new Automate flow with a “When a new response is submitted” trigger.
For your Form Id in the trigger, select the form you just created.
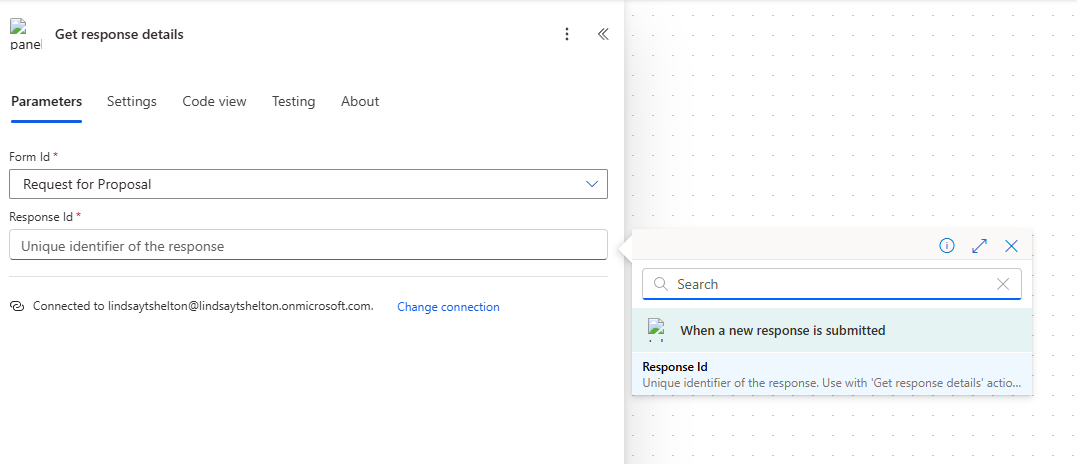
Next, add an action called “Get response details” that also uses the Microsoft Forms connection.
Do the same with the Form Id, and for the Response Id, add the dynamic content of “Response Id” that you got from your trigger (yes, I’m creating this while the images on the actions and triggers are broken, but we must keep calm and carry on).
Now, we are going to use an action called “Populate a Microsoft Word template” that comes from Microsoft Word Online.
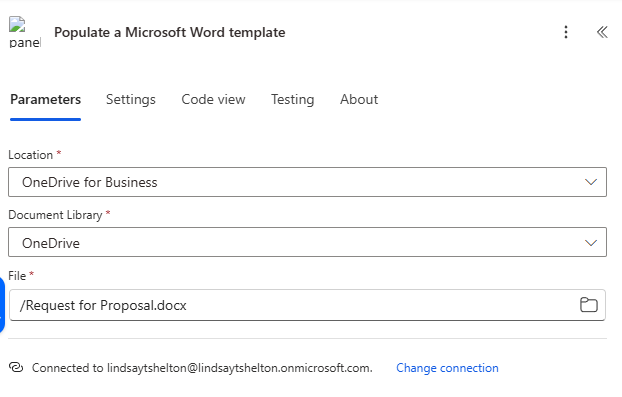
For the Location, I saved my file to OneDrive, so I selected “OneDrive for Business”. For Document Library, I then selected “OneDrive” again. Then you want to browse and find your specific template file. This is what mine looks like:
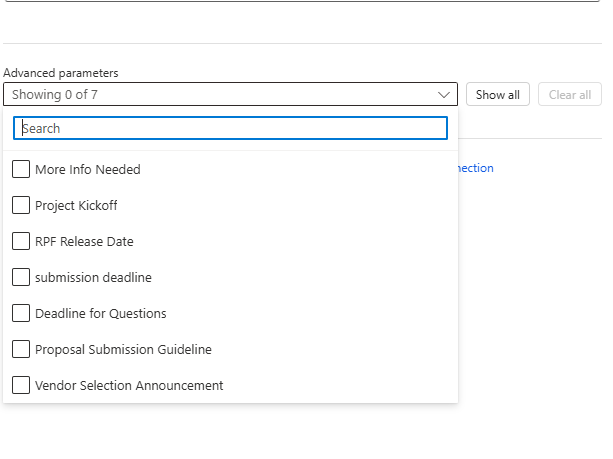
Now if you are using the old designer, your new parameters just show up for you. If you are using the new designer, as of the time of this blog, you have to take the extra step of checking each of them as an advanced parameter to get them to show:
Then you will have something like this:
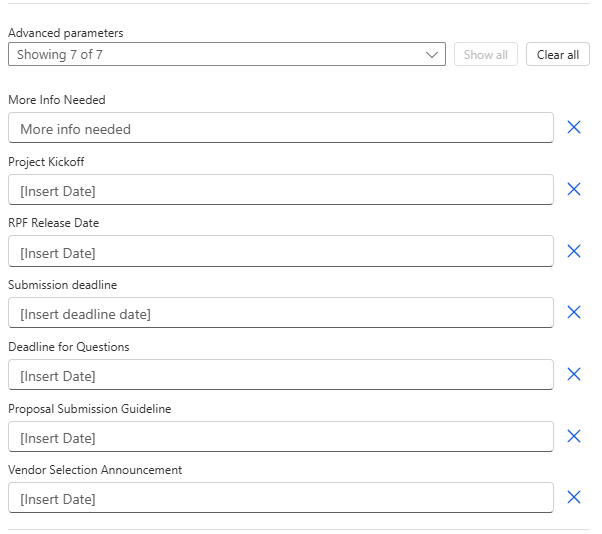
Now all you need to do is match the dynamic content from your form to the proper section of your template.
The last step we need to do is find the Create a file action from OneDrive for Business, though you could create it in SharePoint if you wish.
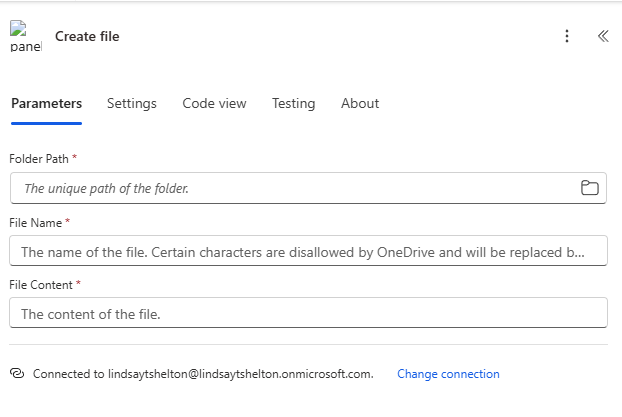
This is how I filled mine in:
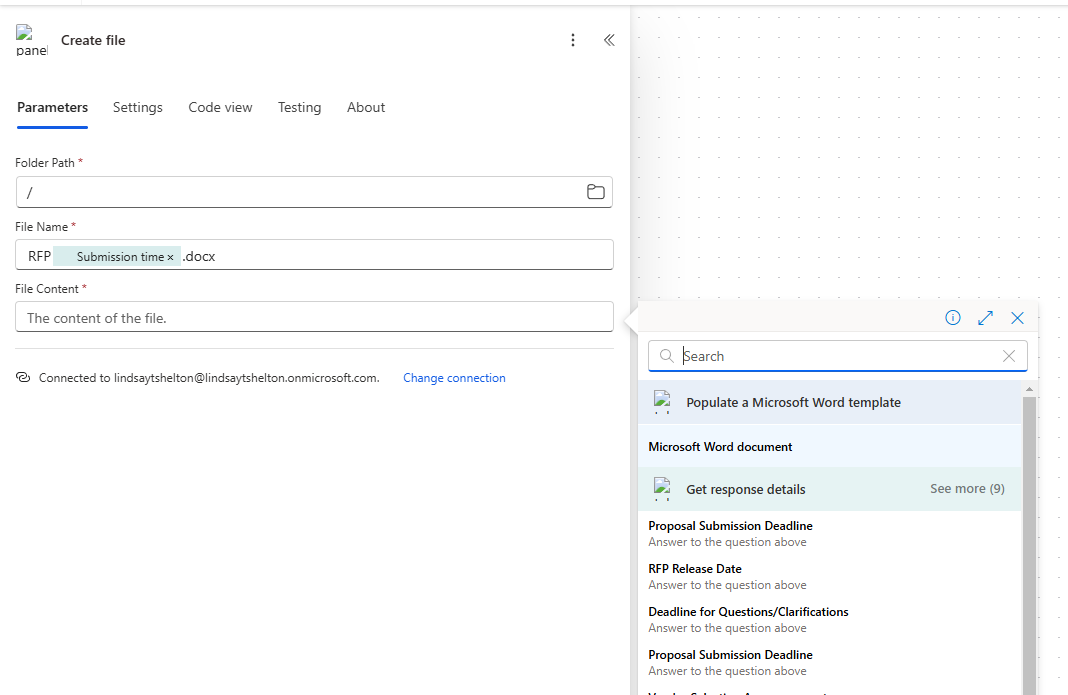
I didn’t put mine in a folder (bad organization, don’t follow that example), just decided to name it “RFP” and then the submission time (though you could easily name it whatever you’d like or add a question to the form to get a file name), ADD .DOCX, and then for file content, you take the dynamic content from the Populate a Word template action.
Now it’s time to save your flow and test it out! For the section where you want to have bullet points, here’s the trick - just copy paste the text from Word or OneNote or somewhere that lets you create bullet points and paste it into the form. You will notice the formatting should carry over into your template. Here’s what I got for mine:
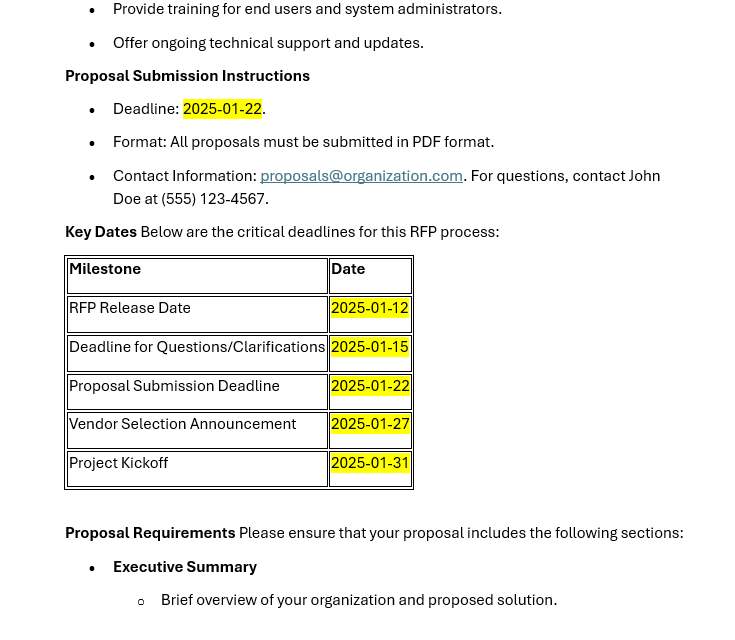
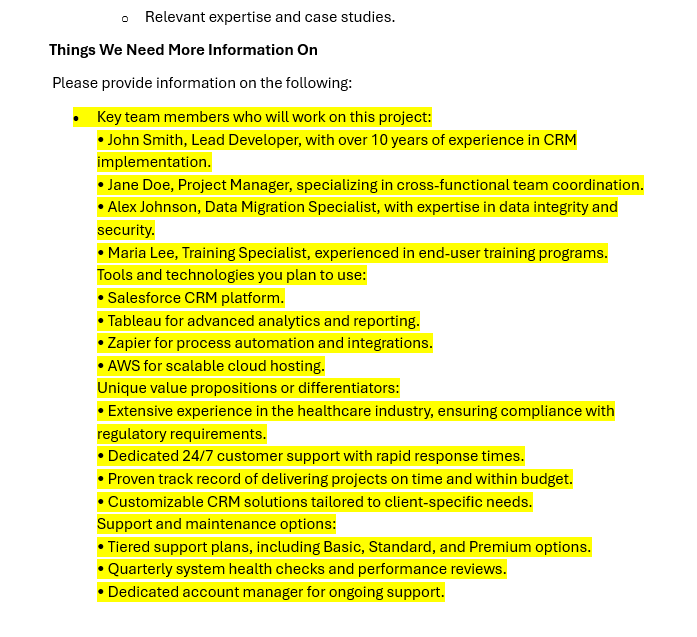
I do have to note that Forms doesn’t like multiple layers of bullet points, as this is what I pasted in:
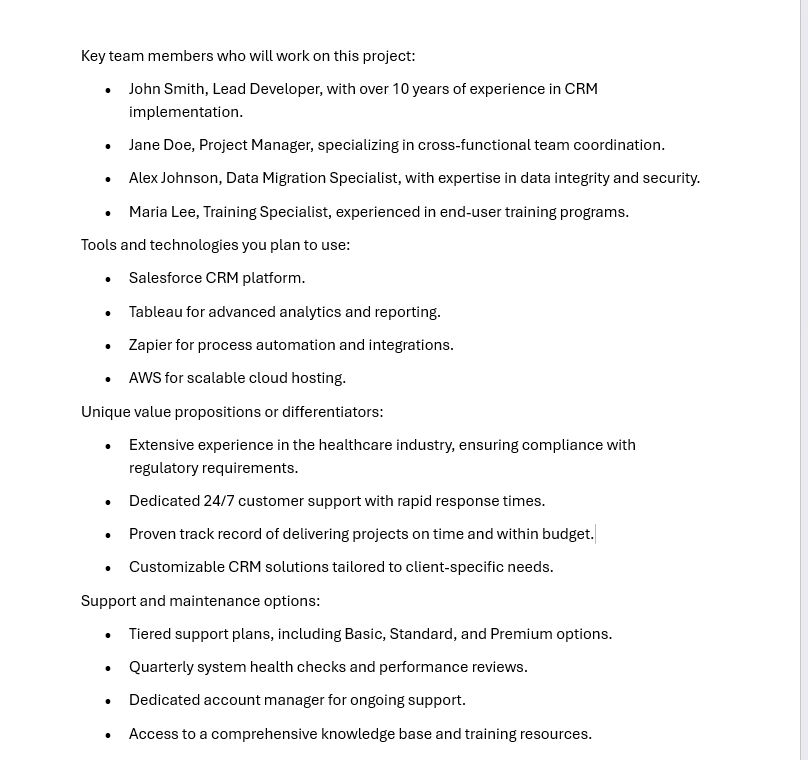
It did work with just a single layer of bullet points for my original POC, however, so your mileage may vary, but some simple clean-up may be needed.
Future State
There’s a lot you can do in Power Automate, like format the dates differently with a simple formula (ask Copilot for help, but here’s one example: formatDateTime(outputs(‘Get_response_details’)?[‘body/rb679241378d34c17b5119417023c60e1’], ‘MM/dd/yyyy’) )
One additional ask from the stakeholders was to not let the stakeholders set the due dates. Easy with some formulas in Power Automate, and even easier if you ask Copilot to write them for you! My plan for this ask is to have the business user just input one date, and then use formulas to calculate the rest of the dates based off of the first date put in.
This in total took me less than 30 minutes to build out this POC, and the stakeholder was totally wowed in the call when I showed it to him, as he said this was exactly what he was envisioning but he didn’t know if it was possible. Power Automate, making your users’ days, one flow at a time!
